Connecting to Tebi Using Cyberduck
You can browse and transfer files using the FTP/FTPS protocol. Follow these steps to connect to Tebi using Cyberduck
Join for free!
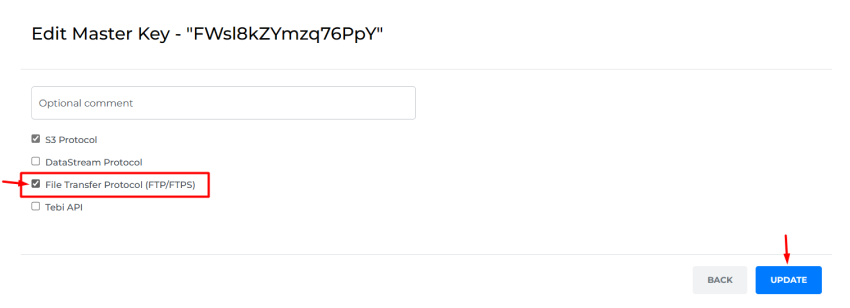
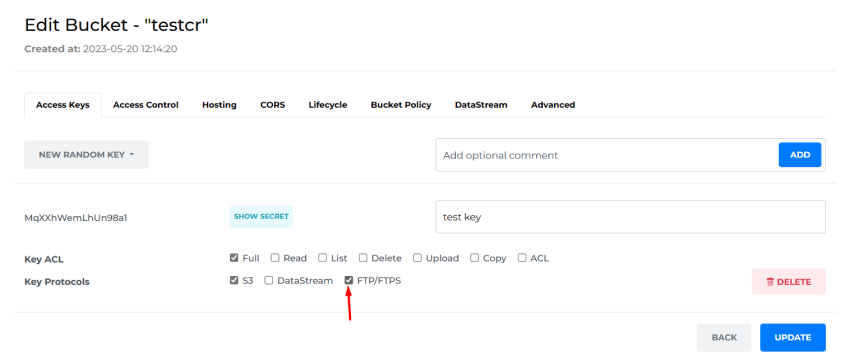
Step 1: Create a Master Key or Bucket Key
Before connecting to the Tebi FTP/FTPS gateway, you need to make sure your Master Key or Bucket Key has enabled FTP/FTPS ACL (Access Control List).
You can see and manage the access keys in the Keys Section of your TEBI interface.

Step 2: Download Cyberduck
Visit the official Cyberduck website at Download (cyberduck.io)
Select the appropriate version for your operating system (Windows, macOS, or Linux).

Once the download is complete, locate the downloaded file (usually in your "Downloads" folder). Double-click on the downloaded file to start the installation process and follow the on-screen instructions.
Step 3: Launch Cyberduck and Configure the Connection
Launch the Cyberduck application to begin the connection process.
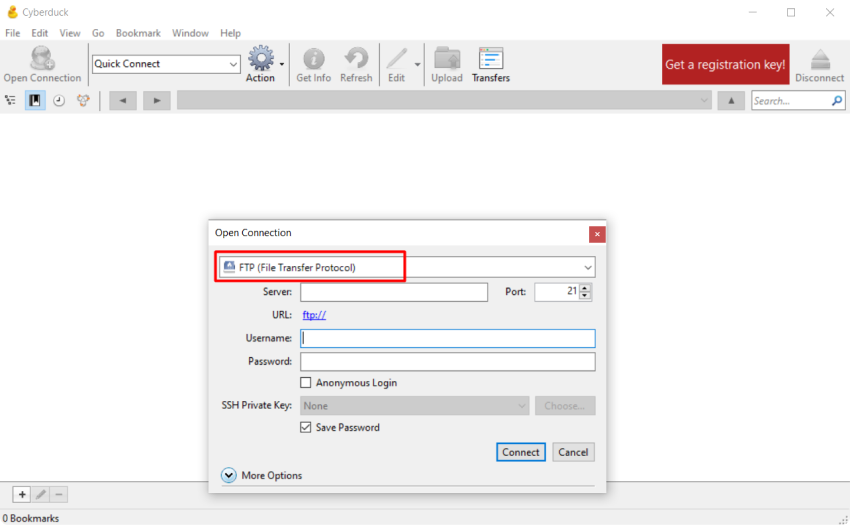
In the Cyberduck interface, click on the "Open Connection" button to configure the Tebi FTP/FTPS connection.

Select "FTP (File Transfer Protocol)" or "FTPS (FTP Secure)" as the connection protocol, depending on your setup.
Step 4: Enter Connection Details
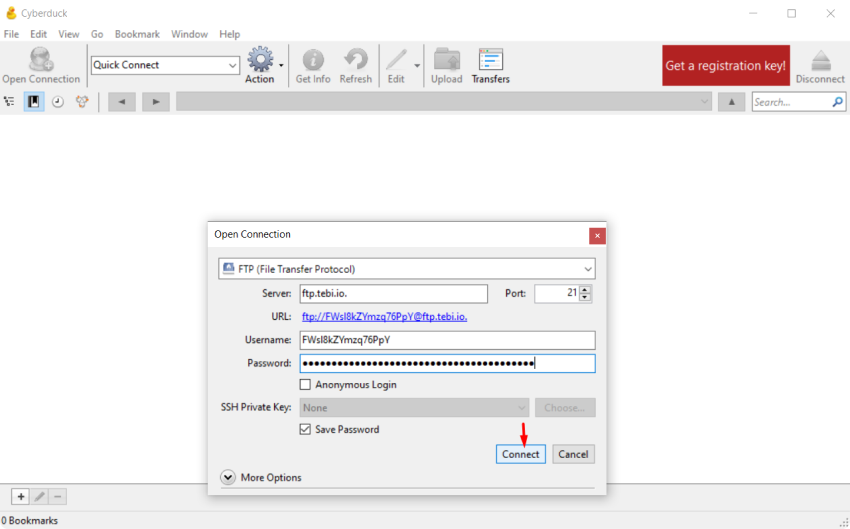
In the connection details screen, enter the following information:
Server/Host: Enter ftp.tebi.io.
Username: Use your Master Key or Bucket Key as the username.
Password: Use the Secret associated with your Master Key or Bucket Key as the password.
Port: Set the port number to the default FTP (21) or FTPS (990) port.
Step 5: Establish the Connection
Once you have entered the connection details, click on the "Connect" button to establish the connection to the Tebi FTP/FTPS gateway.
Step 6: Access Buckets
After successfully connecting, you should see a list of available buckets associated with your Key.
Use the Cyberduck interface to navigate through the buckets and access the desired files or folders.
Tebi FTP/FTPS gateway is available worldwide, allowing you to connect from anywhere and you only pay for the data downloaded and stored.